Multi-Screen Menu Management: Different Menus on Different TVs
Multi-screen menu management lets you display different menus on different TVs all from a single system. Your bar can show drinks on one screen, food on another, and specials on a third. With the right digital menu software, this setup takes minutes, not hours. No more swapping USB drives between screens. No more mismatched prices across multiple menu screens. You control every display from one dashboard. This walkthrough shows you exactly how to set it up. From mapping your layout to verifying content, each step is simple, practical, and actionable.
Step 1: Map Your Screens and Layout
Before touching any software, walk through your venue. Count every TV and note its location. This physical map drives your multi-screen menu management strategy.
Grab a notepad and sketch the room. Label each screen by where guests see it. For example, Screen 1 above the bar, Screen 2 near the entrance, Screen 3 by the dining area.
This visual guide helps you decide what each screen should show. Choosing the right hardware matters here. Each TV needs a compatible media player or streaming stick.
Think about guest sightlines. A screen near the host stand should greet arriving guests. A screen above the bar should highlight drinks. Digital menu boards work best when content matches the screen location.
Good multi-screen menu management starts with this simple planning step. Every screen in your venue serves a purpose when mapped correctly.
Screen Placement Tips
- Bar screens: feature cocktails, beer, and wine lists
- Entrance screens: promote specials and happy hour deals
- Dining screens: showcase food menus with appetizing images
- Outdoor screens: display weatherproof digital menus for patios
Step 2: Assign Content Zones
Now decide what content goes where. This is the heart of multi-screen menu management. Zone management means assigning specific menus to specific screens.
Start by listing your menu categories. Most venues have drinks, food, and specials. Some also have desserts or kids menus. Each category becomes a content zone.
Match zones to the physical map from Step 1. The bar TV gets the drink zone. The dining area TV gets the food zone. The entrance TV gets the specials zone.
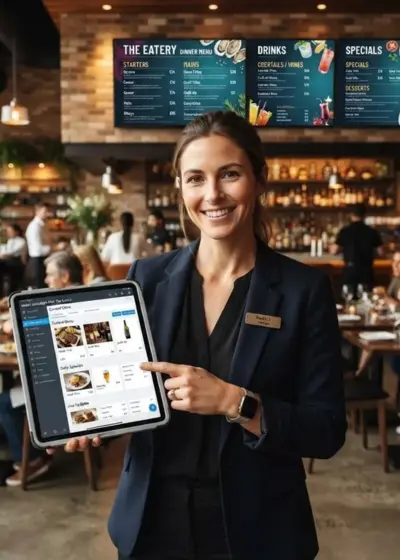
Restaurant Owners See Evergreen’s Digital Menu Software in Action
Join 4,500+ restaurants, bars, and breweries using Evergreen to modernize their menus.
Effective menu display management means guests see relevant content where they stand. Someone at the bar should see drinks first, not desserts.
Think of multi-screen menu management as giving each screen a job. The drink screen sells cocktails. The food screen sells entrees. The specials screen drives upsells.
Why Zones Matter for Guest Experience
Zones prevent information overload. Instead of cramming everything on one screen, you spread content across multiple menu screens. Each screen stays clean and readable.
The National Restaurant Association notes that digital signage can update menus across multiple locations from one place. The same principle applies within a single venue across multiple screens.
Modern Restaurant Management highlights that operators need a clear plan for what goes on each screen. Zone assignment gives you that plan.
Proper multi-screen menu management keeps your displays organized and your guests informed. No screen feels cluttered or confusing.
Step 3: Set Up Your Screens in the Dashboard
With your map and zones ready, open your digital menu software. This is where multi-screen menu management comes to life. Log in to your Evergreen dashboard to begin.
Go to the digital menu section in your dashboard. You will see all connected devices listed. If screens are not showing, verify each media player is online and linked to your account.
Select the screen you want to configure. Assign the matching content zone to that display. For example, assign the drink menu to the bar TV.
Repeat for each screen. Assign the food menu to the dining TV. Assign specials to the entrance display. Multi-screen menu management makes this a smooth process.
Grouping Screens for Even Distribution
Some venues want the same menu spread across two or more TVs. Evergreen lets you group screens together. The system then evenly distributes menu items across all grouped displays.
This is perfect for long bars with multiple TVs showing the same beer list. The content auto-balances so each screen shows the same number of items. No manual splitting required.
Device Groups in Action
One Evergreen user mentioned that digital menu boards eliminated the need to climb ladders for updates. Their staff now manages everything from a computer. This real-world scenario shows the value of centralized menu display management.
You can learn more about cloud-based menu management to understand the full dashboard. Cloud access means you can update screens from anywhere.
Your multi-screen menu management dashboard becomes command central. From here, every screen gets its assignment and every menu stays current.
Step 4: Verify Each Screen Shows the Correct Menu
After setup, verify every screen. Multi-screen menu management only works if each display shows the right content. Walk to each TV and check.
Does the bar screen show drinks? Does the dining screen show food? Does the entrance show specials? Screen synchronization ensures all updates push at the same time.
Make a small test change. Update one price on the drink menu. Confirm it appears on the bar TV within moments. This confirms your multi-screen menu management setup is working.
If a screen shows the wrong menu, reassign the zone in your dashboard. Check the device group settings if items look uneven. Review your digital menu setup guide if issues persist.
Verification is the final step in multi-screen menu management. It ensures your guests always see the right content on the right screen.
Verification Checklist
- Each TV displays its assigned menu category
- Prices match across all multiple menu screens
- Images load correctly on every display
- Updates appear on all grouped screens simultaneously
- No screen shows a blank or error state

Best Practices for Ongoing Management
Once your multi-screen menu management system is live, keep it running smoothly. Review your screen assignments monthly. Seasonal menu changes may require new zone mappings.
Keep your digital menu software updated. Evergreen pushes improvements that enhance screen synchronization and device compatibility.
Train staff on basic dashboard tasks. Anyone should be able to update a price or swap a special. Eliminating manual menu management saves hours every week.
Modern Restaurant Management points out that screen failover systems can redistribute content if a display goes down. This keeps your venue looking professional even during hardware hiccups.
Five creative ways to use digital signage include upselling sides and desserts on dedicated screens. Use your zones strategically to drive higher check averages.
Why One System Beats Multiple Logins
Running separate systems for each screen creates chaos. Multi-screen menu management from one platform solves this. You log in once and control everything.
This unified approach supports multi-location digital menu management too. Start with one venue, then scale to multiple locations using the same dashboard.
Your digital menu software should grow with you. Adding a new TV is as simple as connecting a device and assigning a zone. No reconfiguration of existing screens needed.
For venues focused on drinks, digital beer menu boards pair perfectly with multi-screen setups. Show taps on one screen and cocktails on another.
Effective multi-screen menu management also means planning your content rotation. Schedule drink specials during happy hour. Switch to late night food menus automatically. Your digital menu boards adapt without staff intervention.
Think about menu display management as an ongoing strategy. Review which screens get the most attention. Move your highest margin items to those displays. This maximizes revenue from your multi-screen menu management investment.
Frequently Asked Questions
| Question | Answer |
|---|---|
| Can I show different menus on different TVs with one account? | Yes. Multi-screen menu management lets you assign a unique menu to each screen from one dashboard. |
| How many screens can I manage at once? | Evergreen supports unlimited screens per location. Group them or manage each one individually. |
| Do I need a separate media player for each TV? | Yes, each TV needs its own streaming stick or media player to display independent content. |
| Can I group screens to show the same menu? | Yes. Grouping distributes menu items evenly across all selected screens automatically. |
| How fast do updates appear on all screens? | Changes push to all screens within moments. Screen synchronization keeps everything aligned. |
| Can I schedule different menus for different times? | Yes. Schedule happy hour, brunch, or late night menus to switch automatically on each screen. |

Sync Your Screens, Simplify Your Service
Effective multi-screen menu management transforms how guests experience your venue. Drinks, food, and specials each get their own spotlight. With Evergreen, you control every TV from one simple dashboard. Zone management keeps each display clean and relevant. Ready to unify your multiple menu screens? Book a Demo today. Your screens, your menus, one system.
About Casey Marte
Senior SEO & Digital Marketing Strategist, EvergreenHQ
Casey Marte is a Senior SEO & Digital Marketing Strategist at EvergreenHQ, with over 14 years of experience across content strategy, search optimization, and AI-driven marketing. She specializes in making complex digital concepts practical for the operators who need them most.
At EvergreenHQ, Casey brings a data-first mindset to everything from how your business ranks in search to how your brand shows up across platforms. Whether you are running a single taproom or a growing multi-unit restaurant group, she is focused on making sure your digital presence works as hard as your team does.